How to Work Within The Scrivener Interface
Feeling overwhelmed by the Scrivener interface? There's no doubt that this program boasts a plethora of fantastic features that have helped many writers streamline their work and build their best writing lives, as we discussed in last week's article. But upon first glance, this program and all of its many features can also be quite intimidating.
That's why we're going to break down everything you need to know about working within the Scrivener interface today. Press play below to watch the video lesson on this topic or scroll to read through the transcript and view a few helpful visuals.

(Note: This video lesson uses Scrivener 3 for Mac. Features & interface details may vary if you’re using a different version.)
Welcome back to Storytelling With Scrivener, writer. In this lesson, we’ll work through an overview of the Scrivener program as it first appears after opening a new project.
A quick note: if you’ve made any changes to your Scrivener default settings in the past (or if you are working within Scrivener for Windows or iOS), such as to the icons available in the Toolbar at the top of your screen, your interface may look slightly different. Now, with that established, let’s dive in, beginning with that Toolbar we just mentioned:
Feature #1: The Toolbar
The Toolbar runs along the top of your screen and contains icons that serve as shortcuts, allowing you to quickly access or switch between certain features in the program. We’ll go over each of these icon short-cuts and how you can customize your Scrivener Toolbar in lessons to come.

Feature #2: The Editor or Text Window
Below the Toolbar, in the middle of your screen, you have your standard text window. This window can also serve a few more core functions utilizing different features such as Corkboard mode and Outliner mode, but for now, it’s enough to know that this center window is where the vast majority of your work as a writer will take place.
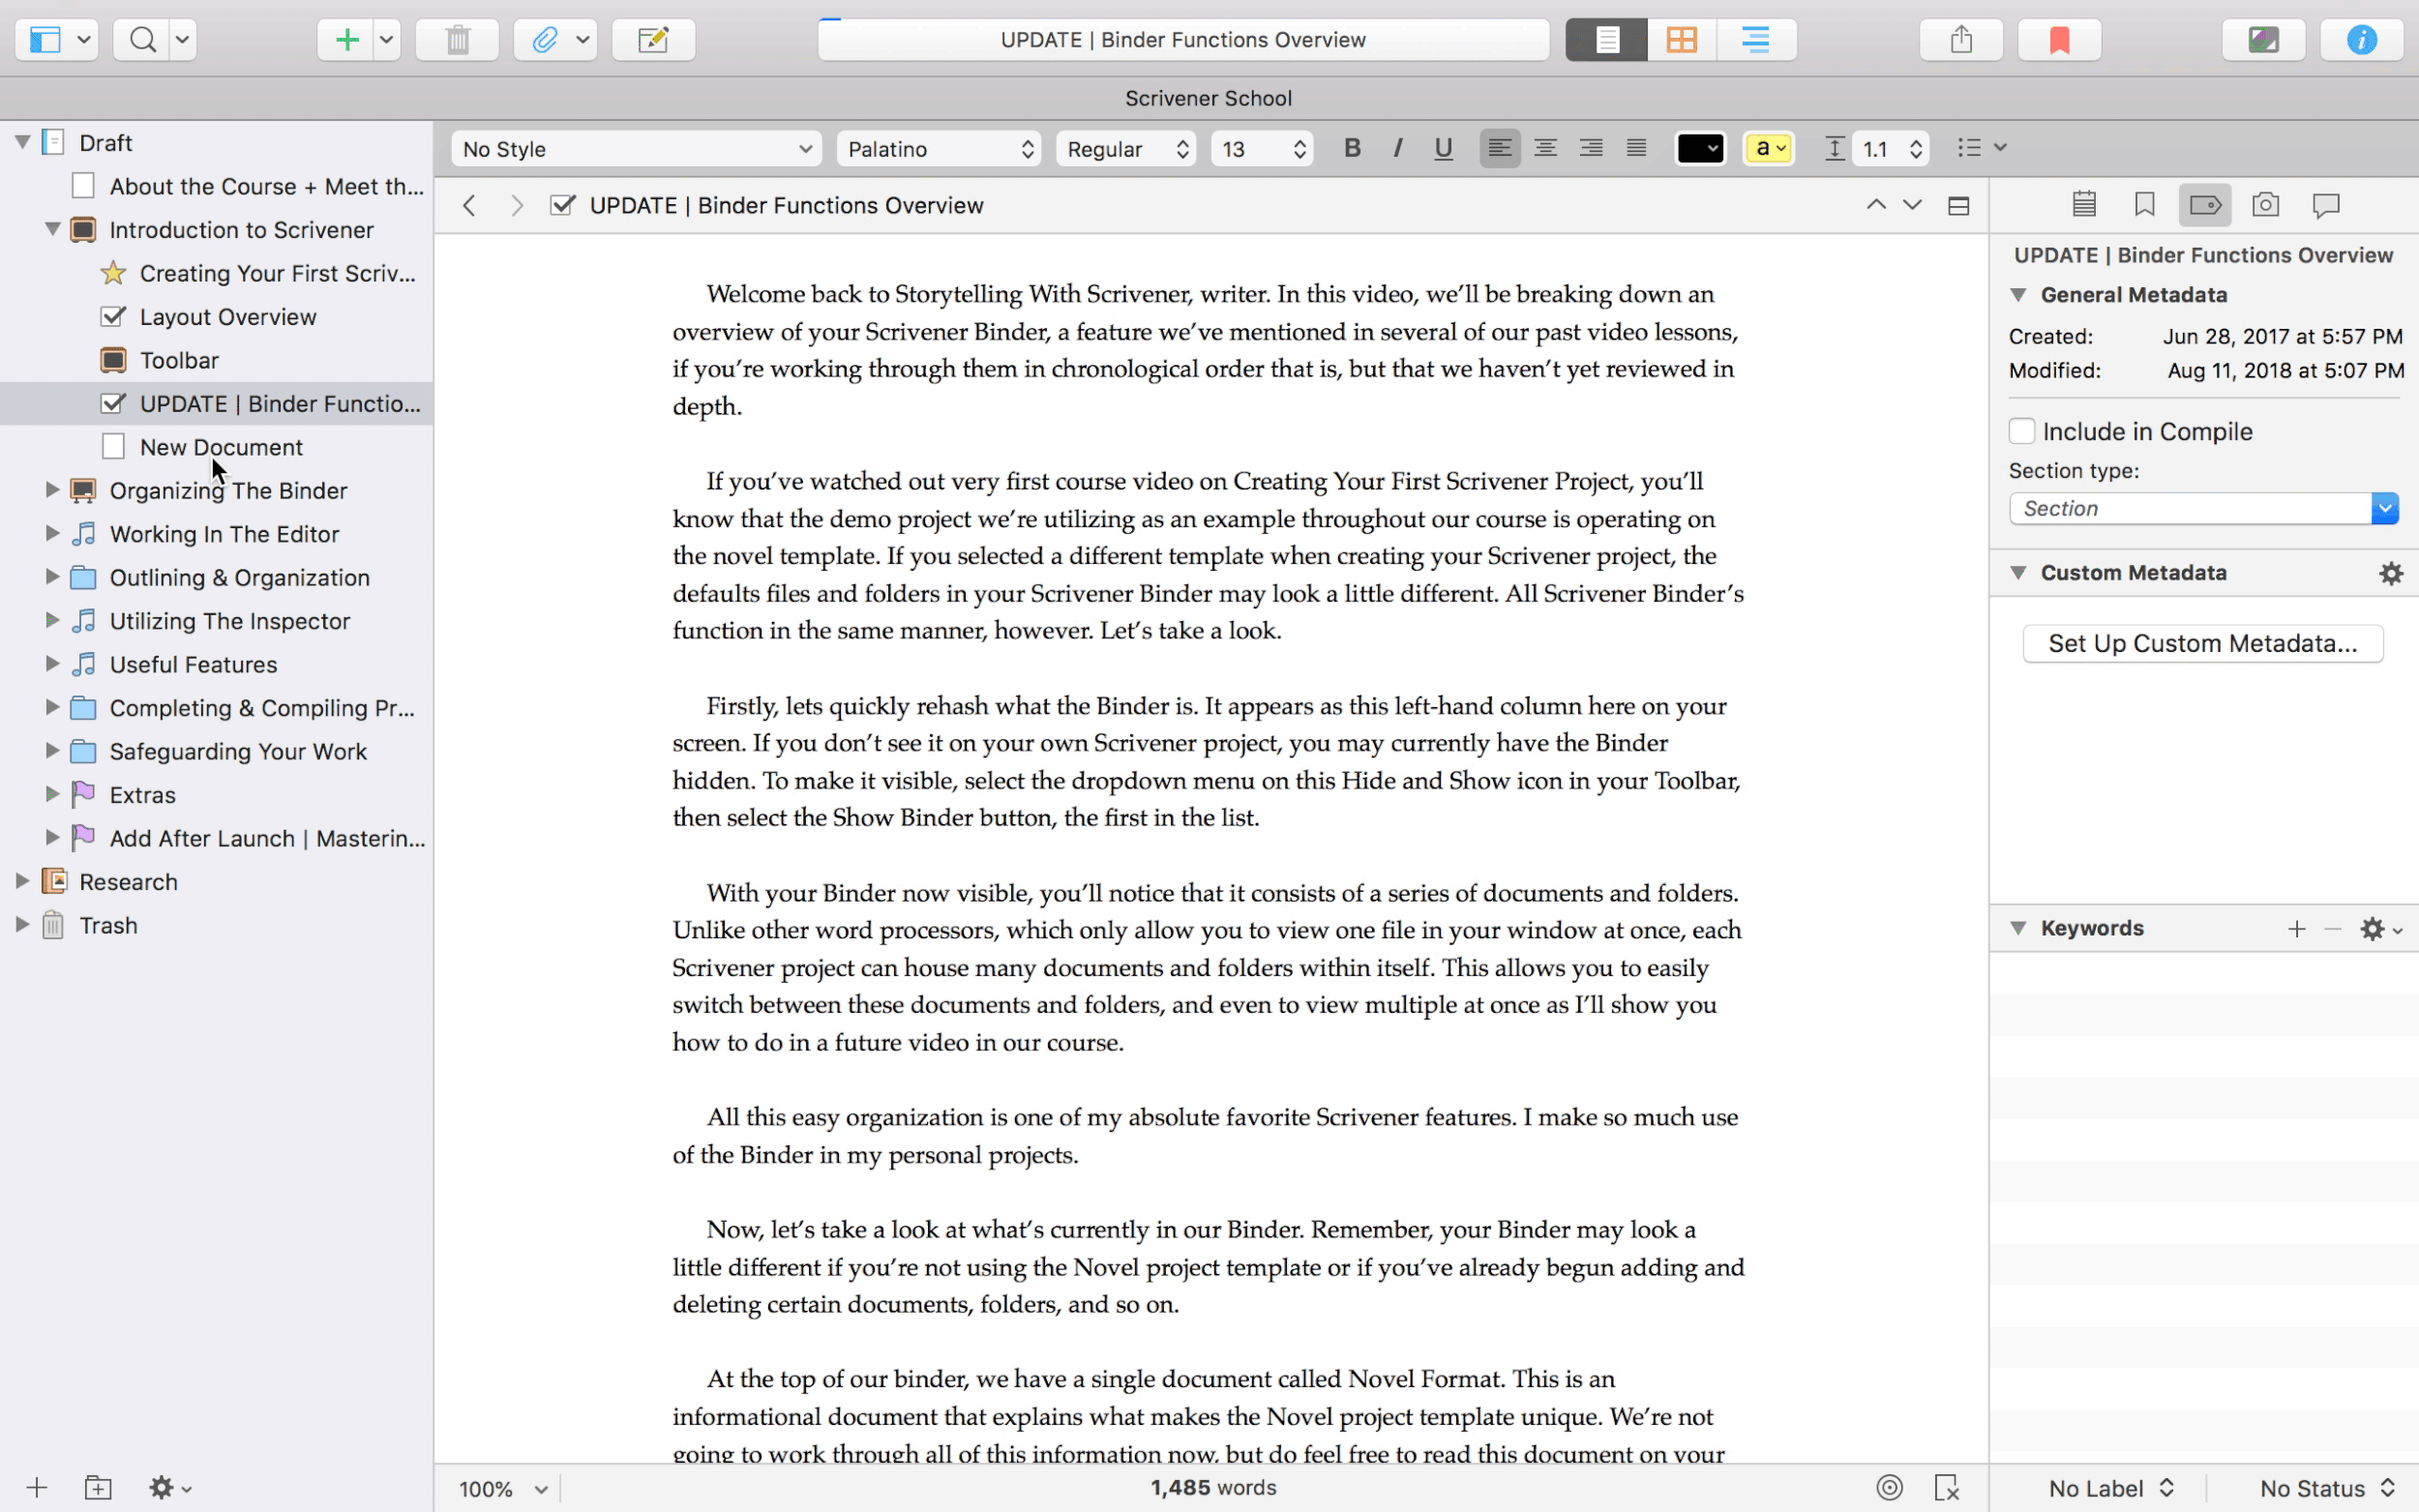
Feature #3: The Binder
On the left-hand side here, we have a column that serves as one of Scrivener’s most fantastic features, in my opinion. This column is called the Binder, and it acts in much the way you’d expect from its name.
In the Binder, you can create individual files representing notes or scenes, as well as folders in which to house those files, helping you organize all of your work for a single work-in-progress right here in an easily accessible format.
This feature, the Binder, has saved me countless hours of scrolling through folders on my computer and switching between individual file windows for different chapters, scenes, and research notes. I love that I can view, organize, and open all of my work for a single project super easily with this feature.

Feature #4: The Inspector
Then, finally, on the right-hand side of your screen we have what’s called the Inspector. It can be accessed using this blue “I” icon in your Scrivener Toolbar at any time.
The Inspector is a tool that allows you to easily organize your notes, bookmarks, keywords and meta-data, comments and footnotes, and even the previous drafts of a single file at a time. So, for example, if we returned to our Binder on the left-hand side of the screen and selected the file called “scene”, any work we do inside the Inspector now on the right-hand side here relates solely to this particular scene.
A pretty neat tool for organizing your work and making the writing process more efficient, especially on long and often complicated projects.
Ready to purchase Scrivener?
This wraps up our overview of the Scrivener program at a glance.
Scrivener is available for Mac and Windows users for a one-time fee of $59.99 USD or a one-time fee of $23.99 for iOS (ex: iPad, iPhone, iPod Touch). You can also take advantage of their amazing free trial, which doesn’t expire for 30 working days.
* These are affiliate links, meaning I’ll earn commission on sales made through these links at no extra cost to you. Thank you for supporting Well-Storied!